9 DIY Garden Trellis Ideas to Transform Your Plants
Are you ready to elevate your garden game? In this post, I’ll share 9 DIY garden trellis ideas that will transform your plants into stunning focal points. Whether you want a classic wooden lattice or a chic metal grid, I’ll guide you through each project with easy steps and materials. Let’s get creative and enhance your garden’s beauty while supporting your favorite climbing plants!
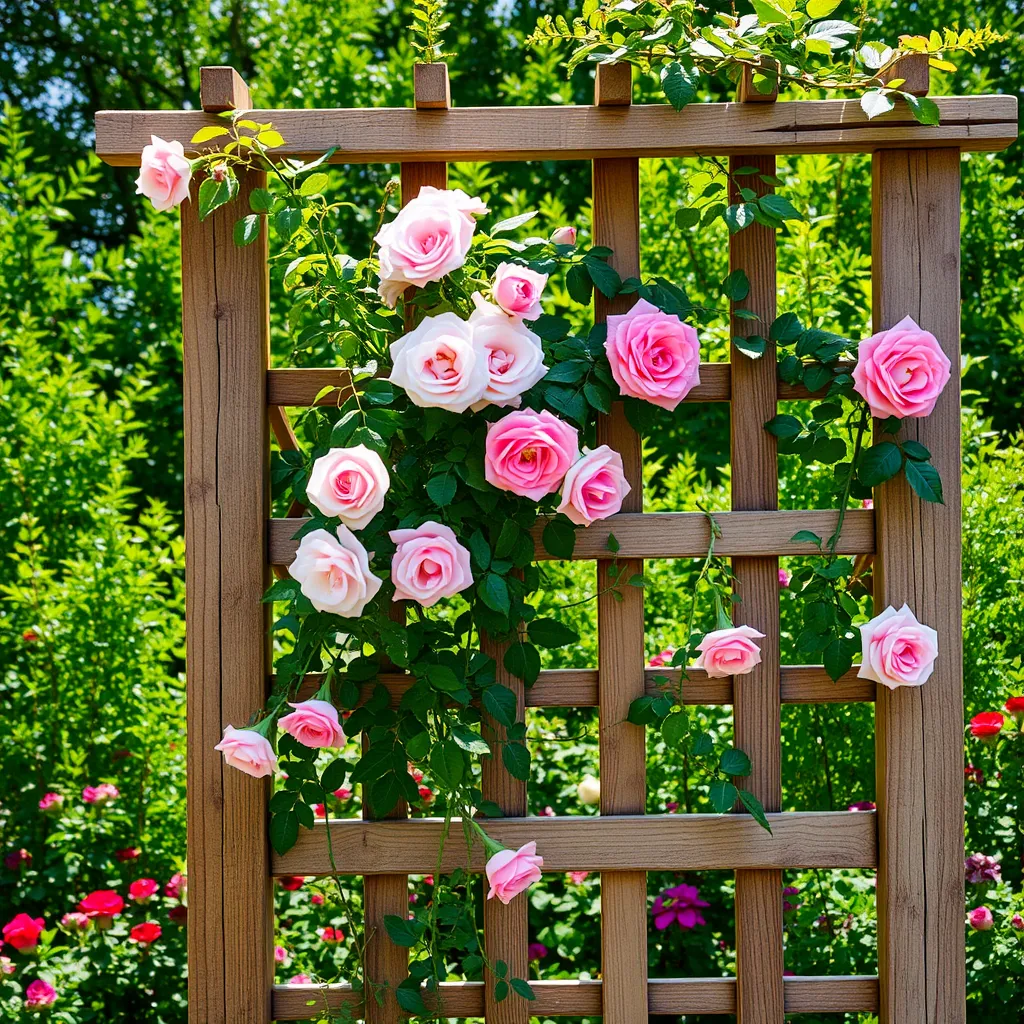
Classic Wooden Lattice Trellis: A Step-by-Step Guide to Creating a Simple Wooden Lattice Structure

Materials Needed
– Cedar or pine wood
– 1×2 inch wood boards
– Wood screws (1.25 inch)
– Wood glue
– Outdoor wood finish
Instructions
1. Cut the wood: Start by cutting four vertical boards, each about 6 feet long. Then, cut four horizontal boards, each about 2 feet long.
2. Create the frame: Lay two vertical boards parallel. Attach one horizontal board at the top and another at the bottom using wood screws. Repeat for the other side.
3. Add the lattice: Cut more 1×2 boards into smaller pieces, about 18 inches long. Space them evenly across the frame. Attach them with screws to form a grid.
4. Secure the structure: Use wood glue at all joints for added strength. Let it dry fully.
5. Finish the trellis: Apply an outdoor wood finish to protect it from the weather.
Ideal Plants
– Climbing roses
– Sweet peas
– Cucumbers
– Pole beans
This trellis not only supports your plants but also adds charm to your garden.
Rustic Bamboo Trellis: How to make an eco-friendly trellis using bamboo poles.

Materials Needed
– Bamboo poles (choose thick ones for strength)
– Twine or jute rope
– Wire cutters
– Saw (for cutting bamboo)
– Drill (for making holes)
Instructions
1. Cut bamboo poles to your desired height. Aim for about six feet.
2. Gather three poles for the vertical parts and two for the base.
3. Use the drill to make holes in the base poles.
4. Insert vertical poles into the holes. Ensure they are straight and secure.
5. Tie the top of the vertical poles together with twine. This creates a stable frame.
6. Add diagonal bamboo pieces for extra support. Attach these with twine.
7. Trim any uneven parts for a cleaner look.
Plant Recommendations
Bamboo supports great plants like:
– Climbing roses
– Green beans
– Peas
– Cucumbers
These plants will climb and spread beautifully on your bamboo trellis!
Metal Grid Trellis: Creating a modern metal grid trellis for urban gardens.

Materials Needed
– Metal mesh (galvanized or stainless steel)
– Metal posts (for support)
– Screws or bolts (for securing mesh)
– Paint or sealant (to protect metal)
Instructions
1. Choose a space in your garden. Make sure it gets enough sunlight.
2. Cut the metal mesh to your desired size. Use wire cutters for a clean edge.
3. Install the metal posts in the ground. Space them evenly for support.
4. Attach the metal mesh to the posts. Use screws or bolts to secure it tightly.
5. Paint or seal the metal if needed. This helps it last longer.
Aesthetic Tips
– Use climbing plants like ivy or jasmine. They add beauty and life.
– Paint the metal in a color that matches your garden decor. This ties everything together.
– Place decorative pots or lights at the base. This enhances the overall look.
A-Frame Trellis: Building an A-frame trellis for versatility in planting.

Materials Needed
– Two wooden beams (2×4 or 2×2 inches)
– Cross beams (1×2 or 1×3 inches)
– Hinges for the top
– Screws for assembly
Instructions
To build an A-frame trellis, start by cutting the wooden beams to your desired height. I usually go for about six feet tall. Next, create a triangle shape by leaning the beams together at the top. Secure them with hinges for easy folding. Attach cross beams at intervals along the sides to support plants. Make sure to use screws for a strong hold. Always wear safety goggles when working with tools.
Suitable Plants
Several plants love A-frame support. Here’s a quick list:
– Peas: They climb easily and grow well.
– Beans: They thrive on the sturdy frame.
– Cucumbers: They need room to spread out.
– Tomatoes: They benefit from the extra support.
This trellis style works great in any garden space.
Repurposed Window Trellis: Using old windows for a vintage-style garden support

Materials Needed
– Old windows (various sizes)
– Sandpaper
– Paint or wood sealer
– Screws or nails
– Hinges (optional)
– Level
– Drill
Instructions
First, select your old windows. Look for those that are sturdy and have interesting shapes. Next, clean the windows with soap and water. Sand any rough edges to prevent splinters. If you want, paint or seal the wood for protection. Join the windows together by using screws or nails. You can also add hinges for a foldable design. Finally, use a level to ensure the trellis stands straight.
Plant Suggestions
Climbing plants work best. Try using clematis or morning glory. These plants will add color and charm to your window trellis. Their flowers will look stunning against the vintage wood. You can also consider using peas or beans for a practical touch.
Garden Arch Trellis: Designing a decorative arch trellis for pathways

Materials Needed:
– Wooden beams (2×4 inches)
– Trellis slats (1×2 inches)
– Outdoor paint or wood sealant
– Decorative elements (such as flowers or vines)
– Screws and nails
Instructions:
1. Choose a spot. Find a nice place in your garden for the arch.
2. Cut the wood. Measure and cut two beams for the sides. Cut two more for the top.
3. Build the frame. Attach the top beams to the sides using screws. Make sure it’s strong.
4. Add the slats. Space the trellis slats evenly on the sides. Attach them with nails.
5. Secure it. Dig holes for the legs and place the arch in the ground. Fill the holes with dirt.
6. Paint or seal. Use outdoor paint or sealant to protect the wood from weather.
7. Decorate. Add climbing plants or flowers around the arch for a beautiful look.
Visual Appeal:
– Planting tips. Choose plants that grow well on arches like clematis or climbing roses.
– Lush surroundings. Plant colorful flowers at the base to create a vibrant scene.
– Lighting. Consider adding fairy lights to enhance the arch at night.
This garden arch trellis not only supports your plants but also adds charm to your outdoor space.
PVC Pipe Trellis: Easy-to-build trellis using PVC for a clean and modern design.

Materials Needed
To build a PVC pipe trellis, you will need:
– PVC pipes (1-inch diameter works well)
– PVC connectors (elbows and tees)
– A saw (for cutting the pipes)
– A measuring tape
– A level (to ensure straightness)
– Optional: spray paint (for color)
Instructions
1. Measure and Cut: Decide how tall and wide you want your trellis. Use the measuring tape to mark your pipes. Cut them to size using the saw.
2. Lay Out the Base: Create a rectangle with the bottom pipes. Use the tees at each corner to connect the pipes.
3. Build the Vertical Posts: Attach the vertical pipes to the tees. Use the level to ensure they are straight.
4. Connect with Cross Pipes: Use the elbows to create diagonal cross supports. This adds strength to the trellis.
5. Finish the Top: Add top pipes to connect the vertical posts. This adds stability.
6. Secure It: If needed, bury the base in the ground or use stakes to hold it in place.
Care Tips
PVC is strong and lasts long. To keep it looking good:
– Clean with soap and water to remove dirt.
– Avoid harsh chemicals that could damage the surface.
– Choose plants that do not weigh too much to prevent bending.
– Check regularly for any loose connections or signs of wear.
Vertical Pallet Trellis: Transforming a wooden pallet into a vertical planting structure.

Materials Needed
– Wooden pallet
– Hammer
– Nails or screws
– Sandpaper
– Paint or wood sealant (optional)
– Garden stakes for extra support
You can find wooden pallets at local stores or online. Make sure the pallet is clean and in good shape. You can sand it down to remove any rough spots. If you want, you can paint or seal the wood for added protection.
Instructions
1. Start by standing the pallet upright.
2. Use garden stakes to secure it in the ground.
3. Hammer nails or screws into the back of the pallet to add stability.
4. If you painted or sealed the wood, let it dry completely before planting.
5. Place soil or pots at the base for your plants.
This setup makes a great backdrop for your plants. It keeps them off the ground and helps them grow tall.
Plant Ideas
– Climbing beans
– Peas
– Cucumbers
– Morning glory
– Sweet peas
These plants love to grow upward. They will use the pallet for support. You can have fresh veggies or beautiful flowers in no time!
Trellis Wall Art: Crafting a decorative trellis that doubles as wall art.

Materials Needed:
– Wooden boards
– Paint or wood stain
– Nails and hammer
– Wire or string
– Climbing plants
Instructions:
1. Start with wooden boards. Choose the size you want.
2. Paint or stain the boards in your favorite colors. Let them dry.
3. Assemble the boards into a trellis shape. Use nails to secure them.
4. Attach wire or string for plants to climb. Space them evenly.
5. Hang your trellis on a wall or fence.
Creative Uses:
You can use trellis wall art to add charm to any space. Hang it in your garden or patio. Add trailing plants for a natural look. You can also use it to support hanging planters. This makes your garden more lively and colorful. It’s a great way to show off your style!
Conclusion
You can create various trellises to enhance your garden. We discussed classic wooden, rustic bamboo, modern metal, and more. Each type has specific materials and steps for building. Plus, there are ideal plants for each trellis style. Use these guides to match your garden’s look and feel. Building a trellis adds beauty and helps your plants thrive. Explore your creativity and enjoy your gardening journey!